How to Fix “Shift to Park” on a GMC Sierra (2020-2026) With a Column Shifter
Disclosure: We may earn a commission when you purchase through links on our site. This does not influence our reviews or recommendations.
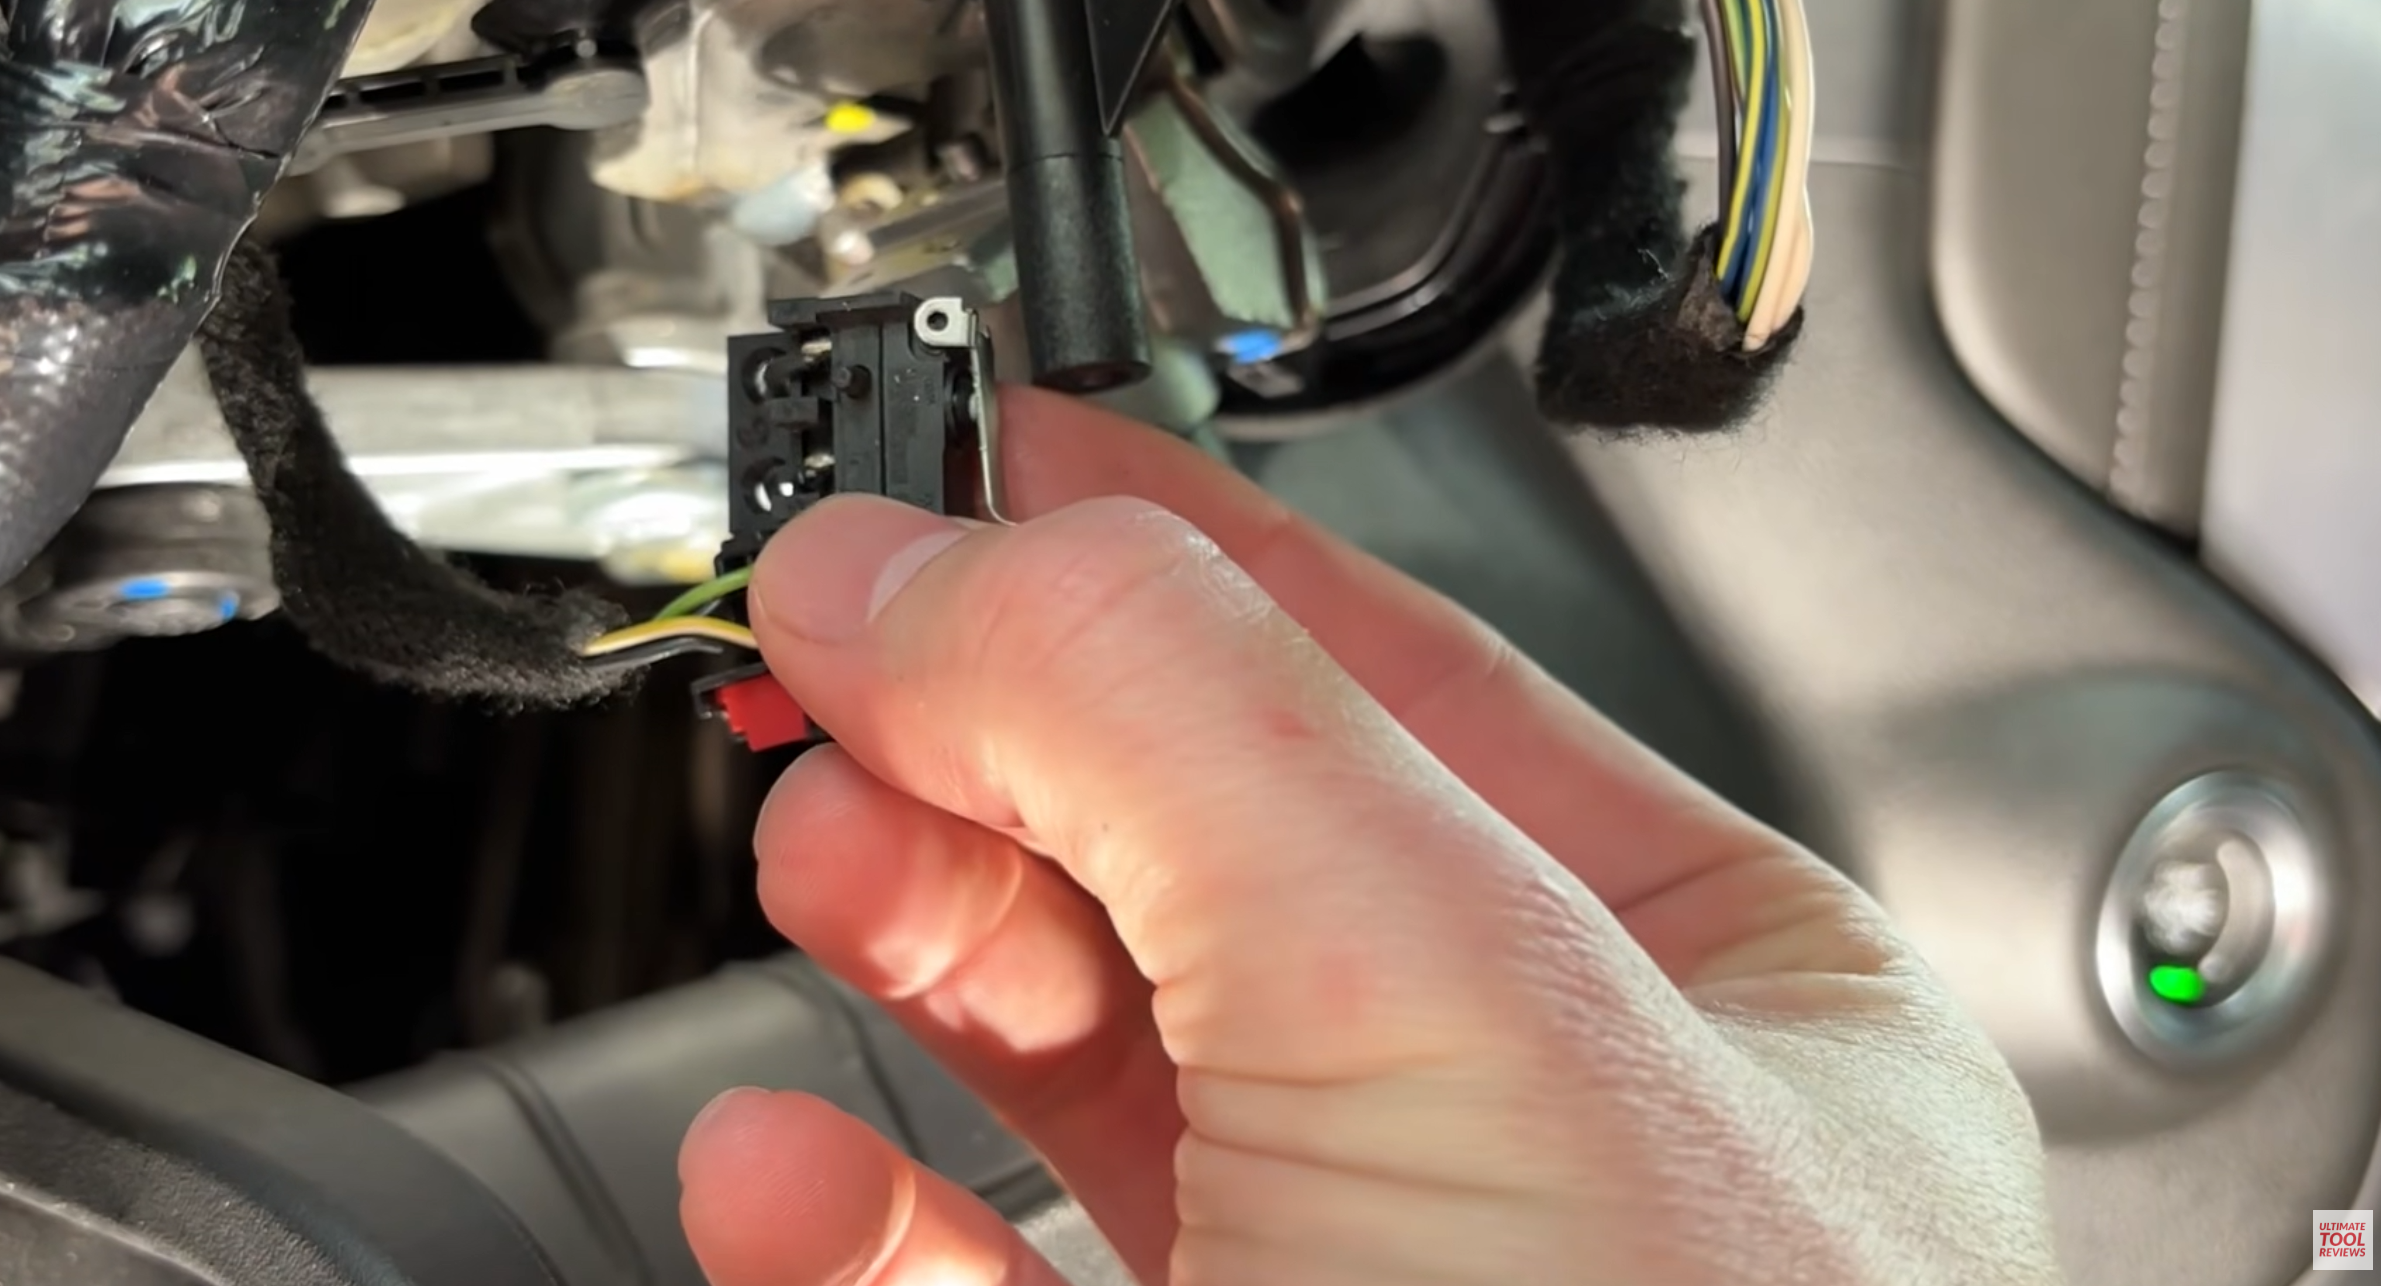
The switch you will be getting access to under the dash.
If you've got a GMC Sierra with a column shifter and you keep getting the "Shift to Park" message even though the truck is already sitting in Park, don't panic and don't go ordering a new shifter assembly yet. There's a decent chance the fix is sitting in your junk drawer right now.
I ran into this on my 2022 Sierra 2500 with the six-speed automatic and the column shifter. Turned out the problem wasn't the transmission at all — it was a tiny microswitch buried inside the steering column shifter assembly, and it was already starting to fail when I got in there to look at it.
I fixed it without replacing anything. Just a socket, a screwdriver, and two zip ties. Here's the whole process, the same one I walked through in the video, written out step by step.
One thing before you dive in: this is what fixed my truck. Verify the diagnosis on yours before you start taking things apart, because the shifter and interlock system is safety-related, and the setup can vary by model year and transmission. If you're not confident about what that switch actually does on your specific truck, just replace the failed part instead of bypassing it. Don't guess on this one.
What's Actually Causing the Message
The truck was going into Park just fine mechanically. The problem was that the microswitch tied to the column shifter wasn't reliably telling the truck "hey, this thing is in Park." So even with the shifter physically in the right spot, the dash keeps nagging you with SHIFT TO PARK because as far as the computer's concerned, it never got the signal.
Once I had the column apart, I could actually see the switch starting to come apart internally — so this wasn't a mystery intermittent electrical gremlin, it was a part on its way out.
The fix is basically forcing that switch to stay in the "closed" position it's supposed to be in when the shifter's in Park, so the truck gets the signal it's been missing.
What You'll Need
Nothing exotic here:
7mm socket and ratchet
Small flathead screwdriver or a trim panel tool
Two small zip ties
That's the whole tool list. If you've got a trim tool, use it instead of the screwdriver for the plastic panels — less chance of gouging anything.
Step 1: Pull the Lower Steering Column Trim
Find the 7mm bolt holding the lower trim panel and take it out. Once it's free, the lower plastic trim around the column should come loose. It's just clipped in around the edges, so don't force it — work your fingers around the seam and it'll pop free.
Step 2: Get the Upper Trim Off
Same idea, one panel up. I worked a small screwdriver in under the edge and gently popped the clips loose one at a time. If you've got a proper trim tool, this is where it earns its keep — a screwdriver works, but it's easier to leave a mark with metal than plastic.
Once the clips let go, set the panel aside so it's out of your way.
Step 3: Turn the Wheel to Get at the Side Fasteners
There are fasteners on both sides of the column trim that you can't reach with the wheel centered. Start the truck up, turn the wheel to expose them, then shut the truck back off — you don't need it running for this part, and there's no reason to have it on while you've got your hands in the steering column.
Pull those side fasteners so you've got clear access down into the shifter mechanism.
Step 4: Find the Microswitch
Look down into the shifter assembly from the left side of the column. You'll see a small switch that handles detecting shifter position — that's your culprit. On mine it was obvious once I got a look at it; the housing was already starting to separate.
Work it loose gently with the screwdriver. There's a wiring harness attached, so don't yank on it — just ease it out of its mount.
Step 5: Zip-Tie the Switch Closed
This is the part that sounds too simple to work, but it does.
Press the switch and you'll feel and hear it click into place. I wrapped a small zip tie around the switch body to hold it in that clicked/closed position, cinched it down, and then added a second zip tie as a backup in case the first one ever loosened up.
That's the entire repair. No new parts, no soldering, no wiring changes — just holding a mechanically failing switch in the position it's supposed to be in.
Don't Reinstall the Switch Where It Was
Here's the part I'd actually pay attention to if I were you: once you've got the zip ties wrapped around it, the switch is now slightly bulkier than it was stock. I didn't want to cram it back into its original mounting spot because that extra bulk could rub against or interfere with the shifter mechanism right next to it.
Instead, I zip-tied the switch itself to its own wiring harness, just enough to keep it from flopping around loose inside the column. The goal is simple: keep it away from anything that moves, and keep it from rattling around.
Before you put any trim back on, physically check that nothing you added — the switch, the zip ties, any slack in the harness — can contact the steering or shifter mechanism. This is the one place on this whole repair where "close enough" isn't good enough.
Test It Before You Reassemble Anything
Don't put the trim back on yet. Start the truck, drop it into Drive, roll forward a few feet, and shift back into Park. Watch the dash.
No Shift to Park warning, no lingering nag — you're done. If it's still throwing the message, better to find that out now with everything still apart than to button it all up and have to dig back in.
Other Ways to Handle This
The zip tie is what worked for me, but it's not the only option. If you'd rather not touch the switch itself, the more conventional route is just replacing the failed switch or the shifter component it lives in.
I also mentioned in the video that you could electrically bypass the switch by jumpering its connections directly. I wouldn't recommend that for most people working on their own truck — if you're not comfortable physically holding a switch closed with a zip tie, you're probably not going to be more comfortable splicing into the wiring. If that's where you're at, just replace the part.
For my situation, the switch itself was still functional — it just needed help staying in position. So zip ties made the most sense.
Why It's Worth Dealing With Sooner Than Later
"Shift to Park" reads like a minor annoyance, but it can turn into a bigger headache than it looks. The truck can act like you never finished the shutdown sequence — which makes it awkward to shut down normally, and can leave things electrically "awake" longer than you'd expect after you think you've parked and walked away.
I didn't want to just keep wiggling the shifter until the light happened to go out. I wanted the actual switch problem handled, not papered over.
Putting It Back Together
Once you've confirmed the warning's gone and you've double-checked nothing you added can interfere with steering or shifting, reassembly is just the reverse of teardown:
Side fasteners → upper trim → lower trim → 7mm bolt.
Before you call it done, run the shifter through every position a few times and make sure everything moves exactly like it did before you started.
Final Thoughts
Of all the odd little problems this truck has thrown at me, this was one of the easiest to actually solve. The transmission was doing its job — a failing microswitch just wasn't reporting it correctly. Instead of replacing an entire shifter assembly over a part that costs a few cents, I pulled the switch, held it closed with two zip ties, tucked it safely out of the way, and the warning's been gone since.
If your Sierra's throwing the same message, it's worth popping the column open and taking a look before you spend real money on parts. Sometimes the fix really is just two zip ties.